What: Applying grease lubricant to the zoom ring for the 17-55mm lens.
Why: From the factory, the zoom ring on the Nikon 17-55mm f2.8 lens is stiff, and rough. Add some grease lubricant to the zoom mechanism to give it that silky smooth zoom action. From the factory, there is no lubrication on the zoom mechanism. The cam follower is made of a self lubricating plastic. I just don't like the idea of parts without any lubrication, and it does not have a smooth feel to it.
Other Nikon zoom lens like the 24-70mm f2.8 zoom has lubricant on the zoom mechanism. When the lubricant wears away on some units, the zoom becomes rough. People have succesfully opened up the 24-70mm lens and lubricated the zoom mechanism. This is the step by step in doing the same to the17-55mm lens.
Question is whether is better not to have grease or to have grease. Grease will give a smoother zoom action, and minimize wear of the zoom mechanism. Potential issues with grease is outgassing and oil migration to the lens or aperture mechanism. However, grease has been used on many lens with out issue. Just a very thin coat of it. Grease can attract dirt, but I am not sure if no grease is the answer. If sand ever get to the zoom mechanism, sand will embed itself on the plastic and make the plastic act like sand paper. Grease may actually attract the sand and hold it away from the contact between the plastic block and the cam. So having grease may be better than dry even if sand gets into the mechanism. Either case, you depend on the weather seal to keep elements away.
Difficulty: This would be normal difficulty if you do this kind of small delicate tasks. There are no lens to align, press fit or adjust. Basically is take apart, apply lubricant and put back together.
Should You Attempt This: This is an expensive lens. New is $1400, and used is $800. It is a little nerve wrecking attempting a job like this. Note that you will be dealing with tiny screws and delicate mechanisms. Be sure you have done that type of repairs before. This is not the time to learn on a lens like this. If you think you are going to have a sudden muscle jerk at the critical moment and gouge a lens, this is not job for you. The most important requirement is having the right attitude. If you value the lens and treat it like a piece of precision equipment, you will do a good job. Trying to hurry and just get it done, and things will go bad. Most important thing is putting the right pressure on the screw driver so you can loosen the screw with out stripping the head. Start the threads carefully so you don't cross thread. Always turn in reverse until you feel the drop to indicate the very start of the thread before screwing a screw in.
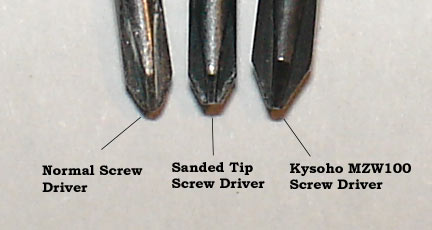
Tool: The most important tool is the right phillips screwdriver. Please do not use a Radio Shack screw driver. This is a Japanese made lens, and you need JIT screw driver. Basically is a standard driver with the pointed head truncated. See picture below. Screw drivers in the US have pointed head. These screw drivers do not have a pointed head. You can sand down a Radio Shack type mini screw driver, or get the right one at Cool Tool. The one here at micro-flight is highly rated also. Use a standard screw driver, and you will most likely strip the head of the screw!
Grease: Use lithium grease or camera specific grease. I use Pedros Syn Grease because the oil has not separated from that grease in 10 years that I own the tube of it. Here is the official grease used by camera manuracture.
Steps: - Here we go
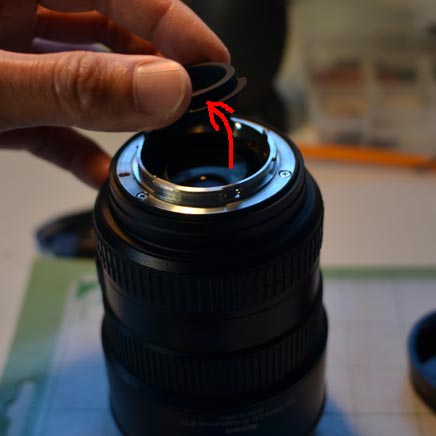
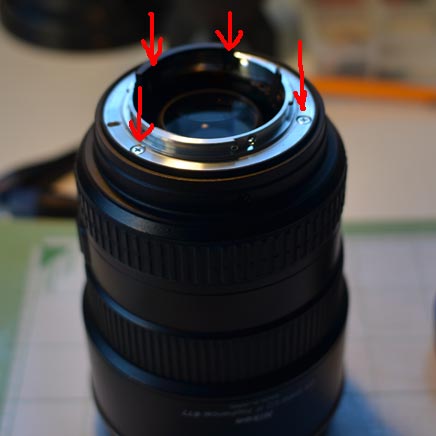
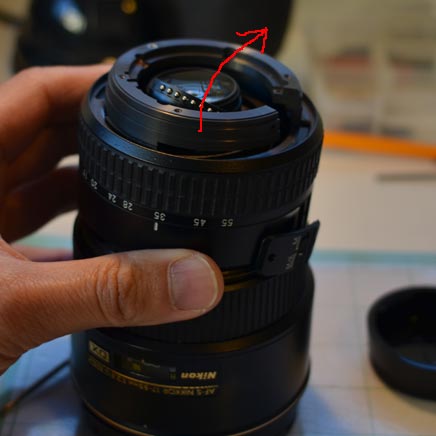
Take off 3 screws that hold the Bayonet Mount Cover Ring.

Remove cover ring.
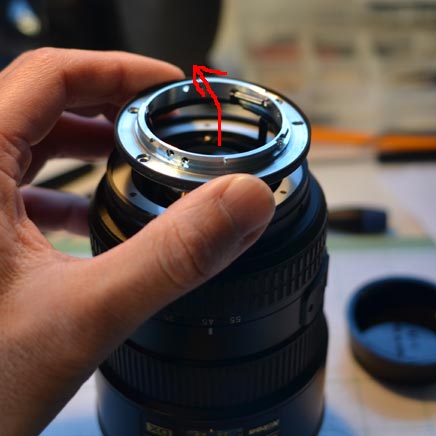
Remove 2 screws that hold the electrical contact block to the bayonet.
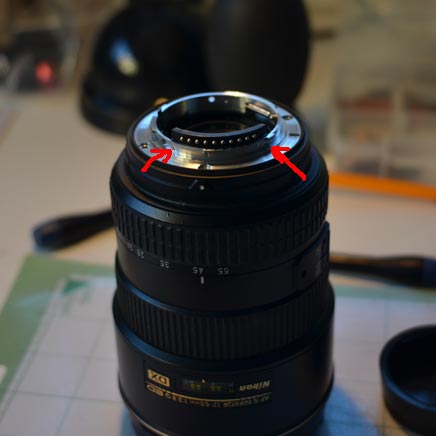
Electrical contact block will just drop off, but still connected to the inside of the lens by wires.
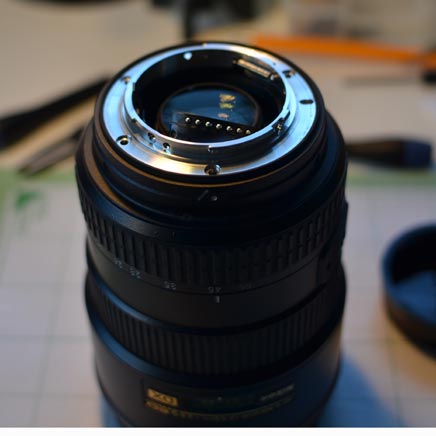
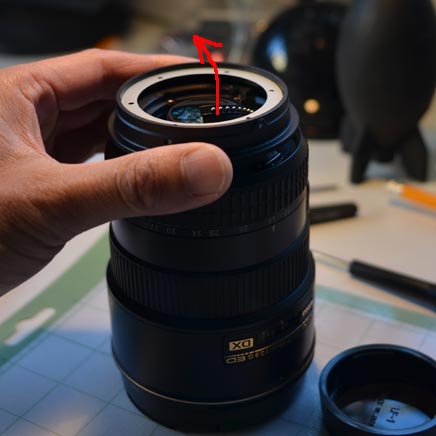
Remove 4 screws and lift the bayonet off
Remove 3 screws on the outside and lift off the index ring.

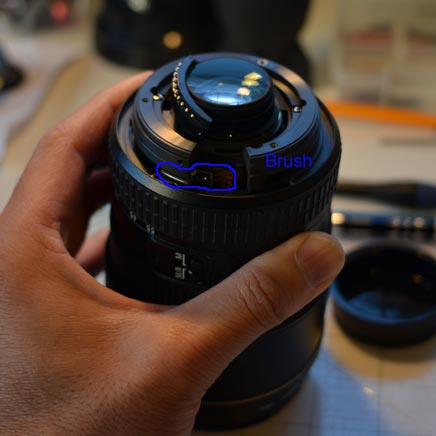
Rotate zoom to 17mm and remove inner screws that hold the electrical brush.
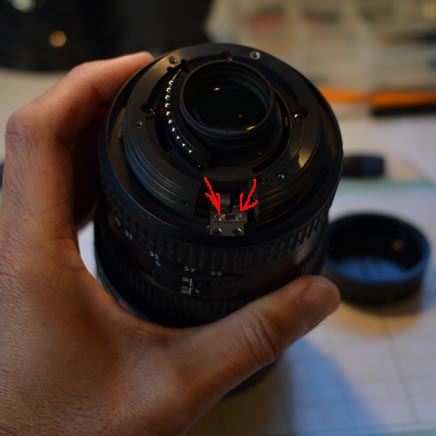
This is the brush that need to be removed.

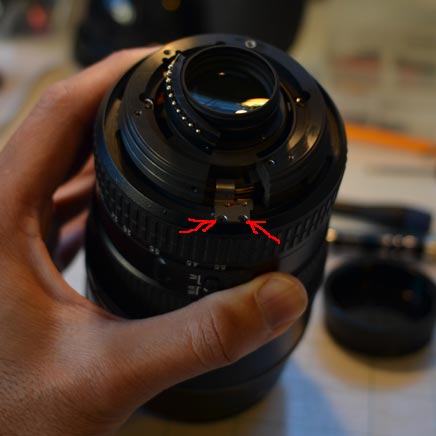
Rotate lens to 28mm zoom to gain most access and remove the brush. Careful not to bend the brush.
Now remove the screws for the brush holder that is also the zoom connecting plate. Remove the brush holder / zoom connecting plate.

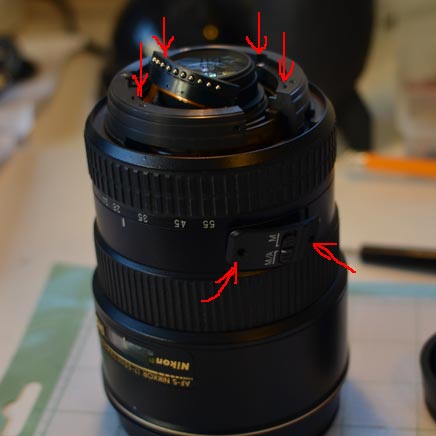
Remove 4 screws that hold the zoom ring. Also remove 2 screws that hold the M/A selector switch. Remove zoom ring.
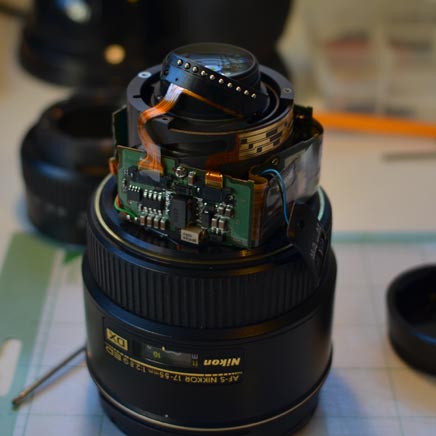
Disassembly complete. Do not disassemble any lens element. You will need realignment if you do.
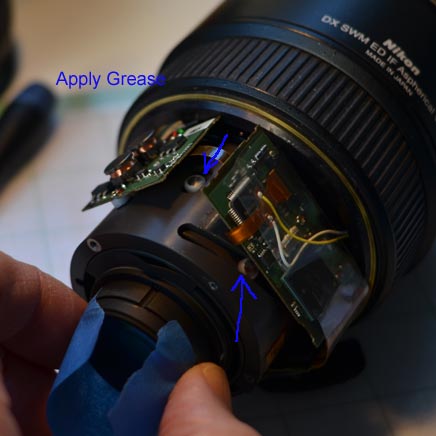
Apply grease to the plastic slider in the cam ring. Apply just enough grease to allow sliders to operate smoothly. Very light coat of grease should be enough.
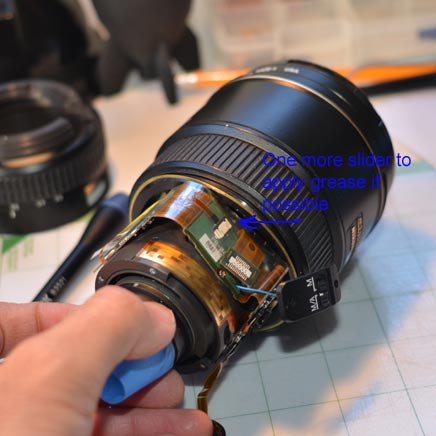
There is one more slider near the focus ring. Apply grease there also. Try the zoom ring at this point to make sure it operates freely before closing the lens back up.
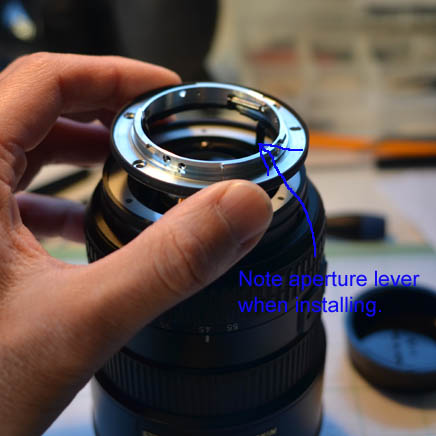
Assembly is reverse of disassembly. The only thing to watch for is when installing the bayonet near the end of the assembly process. The bayonet contains the aperature lever. This is the lever that when you move it, it opens and close the aperture. The lever sticks out the back of the lens. That same piece has a lever that sticks down inside the lens to open and close the aperture. It is how the lever engage the aperature mechanism inside the lens that you have to watch for.
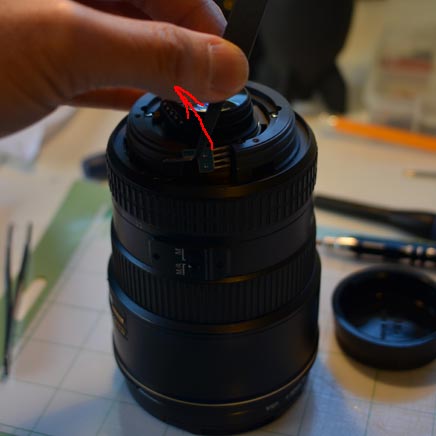
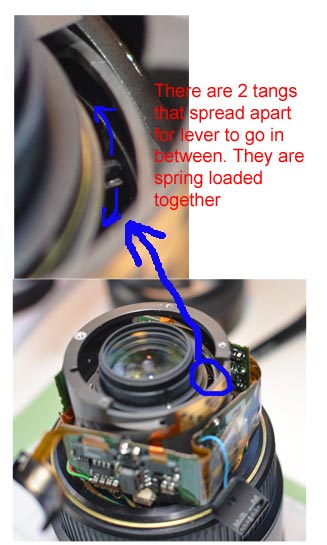
Look inside the lens where the aperature mechanism is. It looks like a single tang, but is actually two tangs that are spring loaded together. One is taller than the other one. You can experiment with a small screw driver beforehand. Push the taller tang counter clockwise. This opens the aperature. The shorter tang will move with the taller tang because they are spring loaded together. However, when you push the taller tang counterclockwise as far as it will go until aperature is at the largest f2.8 position, small tang will stop moving. Now there is a space between the tall and short tang. This space is where the aperture lever from the bayonet goes.
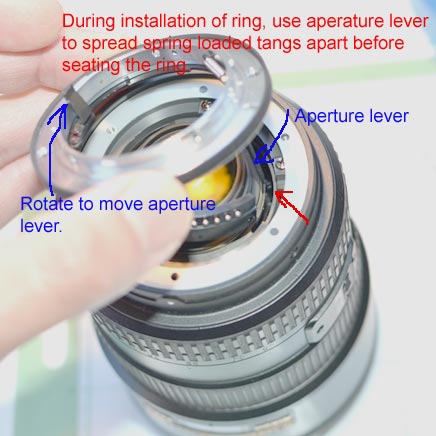
Use the aperature lever on the bayonet ring to spread the aperture tangs apart before installing the bayonet ring. Spread the aperature tang apart by pushing the taller tang counterclockwise as far as it will go until the shorter tang is no longer following the taller tang. Then there will be a space between the taller tang and the shorter tang. That is when you insert the aperature lever between the tangs and install the bayonet. You can see what you are doing by looking at the aperature tang thru the center of the bayonet. Get some light in there. The aperture tang is pointed to by the red arrow below.
Install the bayonet and the rest of the parts. That is all there is to it. Now the zoom is silky smooth.